She is a very good photographer who is getting better all of the time because she is always getting out there and shooting.
This tutorial will show how when you have a very good picture to start off with, how easy it is to make it outstanding.
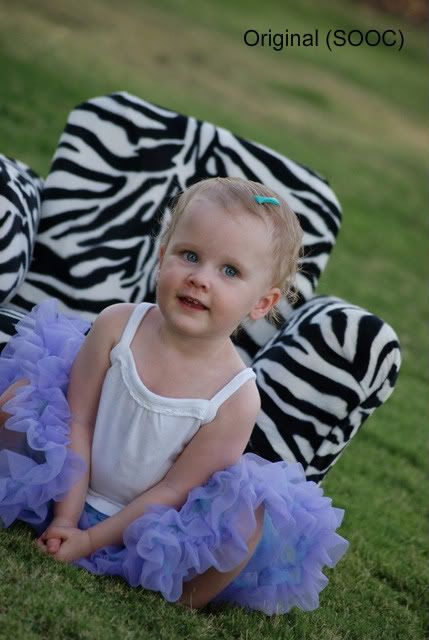
She took the following picture of her daughter and loved it and asked if I could give it that little extra something.
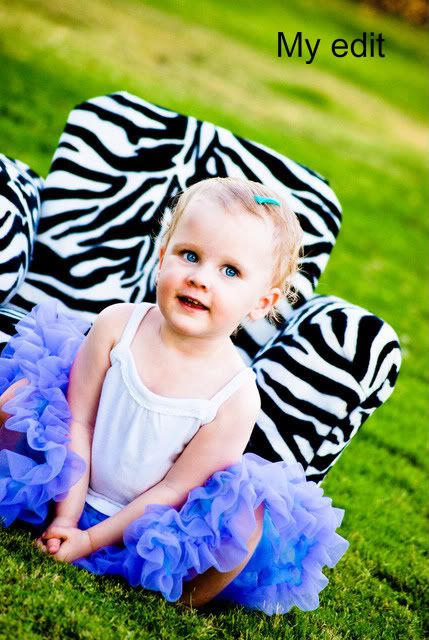
 And then after just a few fixes
So how did I get to my fix?
She had a bit of a rash on her face and a runny nose, so I first used the retouch brush in iPhoto. Most programs have a retouch brush that you just click over the area you want fixed, so easy.
Then I took the picture into light room and the following is all I did.
1- Increase black clipping (sliding bar by the word black) +6
I did this as the little triangle on the left side of the histogram was not lit up and so I increased the black a little
2- Increased the brightness +61
3- Used a brush-Wow Eyes Sharpen and did one quick swipe over each eye
4- Used the Brightness brush, increased the size of the brush and swept it once over the left side of her face as it was a little too shadowy
5- Used Preset- Semi Fix the Flat
6- Increased the Vibrancy
7- Decreased the red saturation to -27
So 7 steps may sound like a lot-but it took me at most 4 minutes, probably less to make this fix.
Obviously, the less time you can spend fixing a picture the better off you are. So when you start with a great picture it is so much easier.


Have a picture you would like me to fix? She had a bit of a rash on her face and a runny nose, so I first used the retouch brush in iPhoto. Most programs have a retouch brush that you just click over the area you want fixed, so easy.
Then I took the picture into light room and the following is all I did.
1- Increase black clipping (sliding bar by the word black) +6
I did this as the little triangle on the left side of the histogram was not lit up and so I increased the black a little
2- Increased the brightness +61
3- Used a brush-Wow Eyes Sharpen and did one quick swipe over each eye
4- Used the Brightness brush, increased the size of the brush and swept it once over the left side of her face as it was a little too shadowy
5- Used Preset- Semi Fix the Flat
6- Increased the Vibrancy
7- Decreased the red saturation to -27
So 7 steps may sound like a lot-but it took me at most 4 minutes, probably less to make this fix.
Obviously, the less time you can spend fixing a picture the better off you are. So when you start with a great picture it is so much easier.
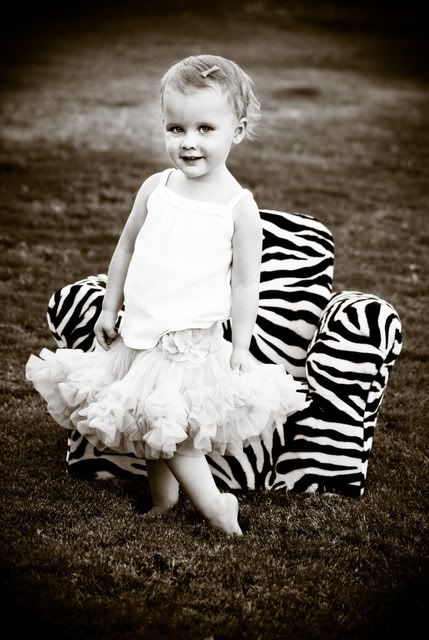
And she actually sent me a couple of pictures asking if I could fix one or both, and since the fix was so easy and fast, here is the second picture I did just for fun.


Send me a picture at photo (at) emmymom2 (dot) com
Just be advised I have about three more pictures waiting, so it will be about one month until your edit is done.

The eye fix on the first one is what I have TRIED to do! Without success! I can't wait to hang these in the house now! Thanks so much!!
ReplyDeleteVery nice changes! Impressed as usual! ;)
ReplyDeleteAwesome edits! Her eyes are gorgeous!
ReplyDeleteI like the edits and the steps you too to get there. Thanks for sharing. I have to admit I was a little confused when I say Daisy on your blog but it all makes sense now. Great job!
ReplyDeletePSP doesn't do half that stuff....hmmmm maybe a future Christmas present. Which program would recommend? Beautiful edits by the way.
ReplyDelete