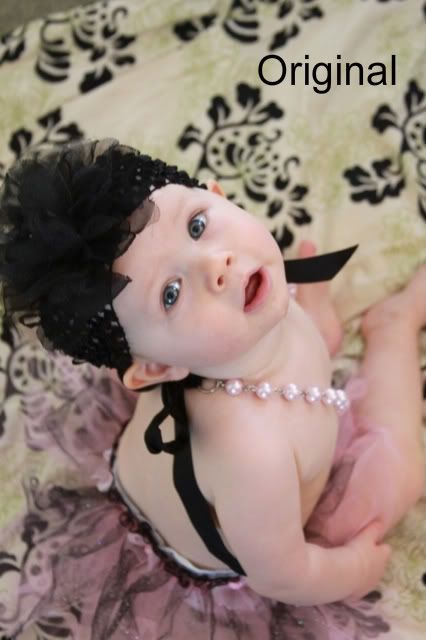
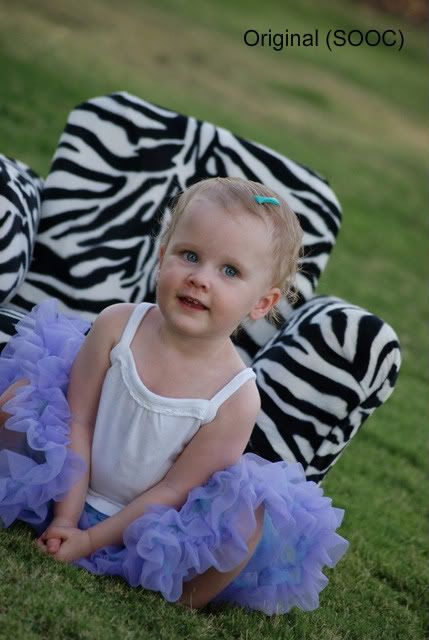
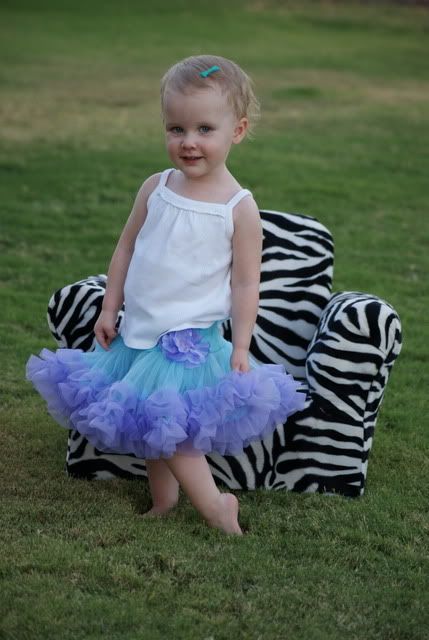
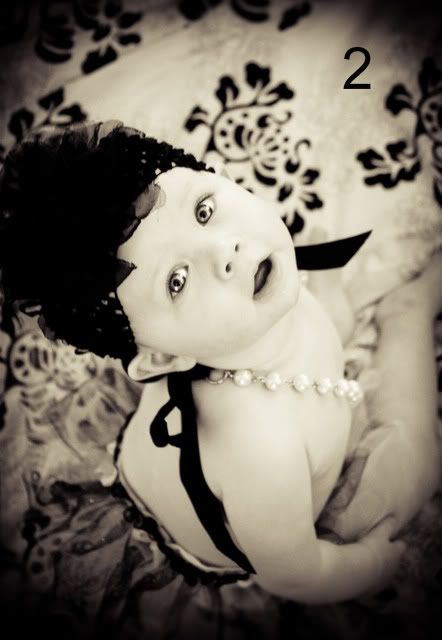
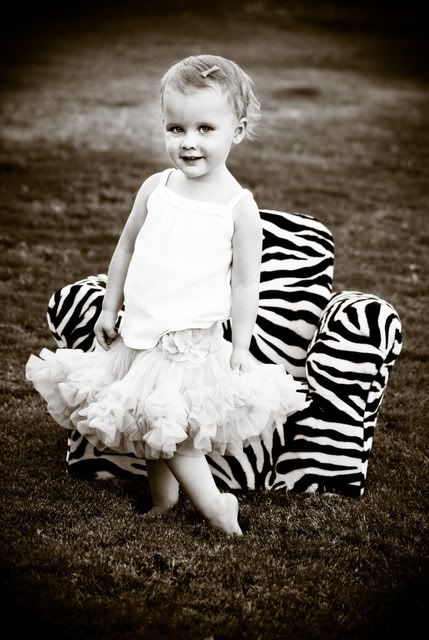
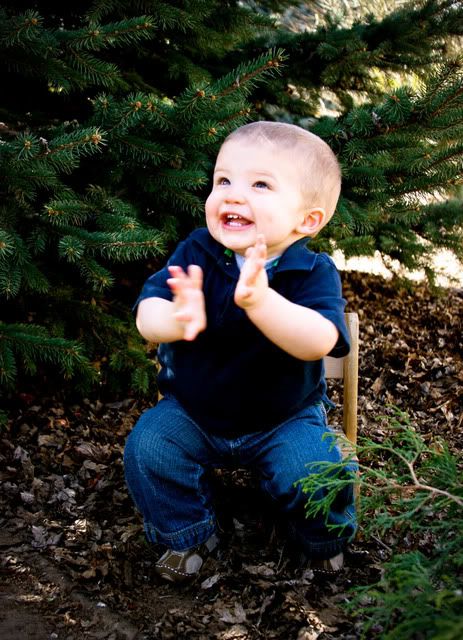
My Main Blog Can Always Be Found Here
Showing posts with label Fix It For Me. Show all posts

Wednesday, March 16, 2011

How To Edit Pictures in Lightroom 3

This week for my Fix it For Me Wednesdays, I am going to show you how I edit pictures using Lightroom 3. I decided rather than just tell you what I do, I would show you. So first here are the before and afters-the after is a slightly different than the one I showed on Monday as I started over from scratch to show you how Lightroom 3 works.

BEFORE
AFTER
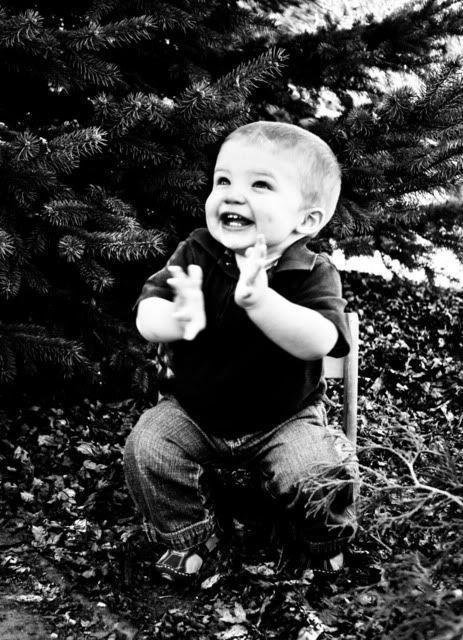
And how I am going to show you how Lightroom 3 works? With this video tutorial. It is a bit long, but if you are interested in photo editing you should enjoy it. You might want to click to view it larger to see the details better.

Wednesday, February 23, 2011

Fix It For Me Wednesday: Lots of Looks

This week's picture came from my good from Em (Emily-awesome awesome name) of Emilisq. She has been one of my long time blogging friends. She sent me this adorable picture of her daughter that her friend actually took. Today, rather than go through a step by step-I want to show you how drastically a picture can change and how with simple presets available for Lightroom can change the look of a picture with one click.

Whenever I am going to be trying lots of different looks to a picture, I always "fix" the picture first. Fix the exposure, sharpen the eyes, get rid of any blemishes (which there weren't any on this baby), do any cropping. Basic things that I know I will want to be fixed no matter what look I give the picture.

In this picture, besides the eye sharpening, etc, I extended the blanket in the upper left hand corner, I increased the exposure a lot and also decreased the red saturation quite a bit to get that creamy white skin that is popular on babies in pictures currently.

And then I just started to have a little fun


1- Preset: Summer Love (by Pretty presets)
2- Preset: Old Hoga B&W
3- Preset: Kiss & Tell
4- Preset: B&W Bliss and Black Border (by Pretty Presets)
5- Preset: Mocha And the Preset Vignette

Before I applied any of these presets, I went back to my fixed picture and started from there. In a lot of ways I think #3 is my favorite-the coloring just really seems to work for me with the whole look of the picture. Obviously I would not want to give this look to an entire session, but for a single picture here and there it is awesome.

Which is your favorite?

Wednesday, February 16, 2011

Fix It For Me Wednesday: Good to Amazing

This week's picture came from the wonderful host of Monday Mugs... and I just realized I don't know if she ever uses her real name on her blog-so the nameless beauty of Oswald Cuties :)

She is a very good photographer who is getting better all of the time because she is always getting out there and shooting.

This tutorial will show how when you have a very good picture to start off with, how easy it is to make it outstanding.

She took the following picture of her daughter and loved it and asked if I could give it that little extra something.
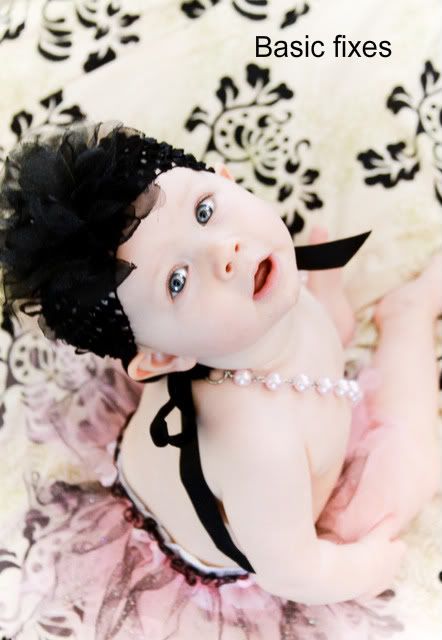
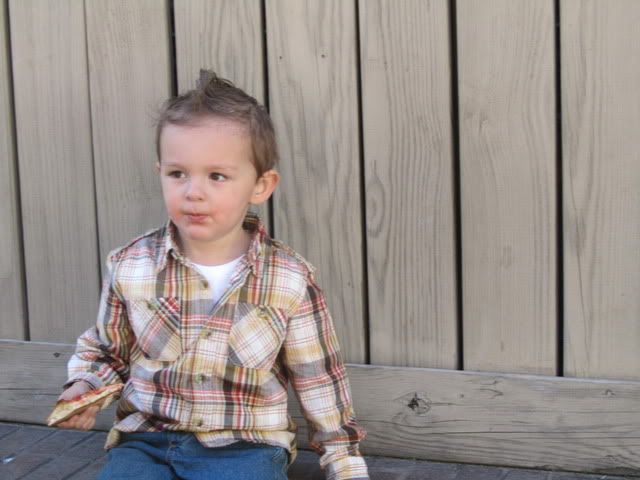
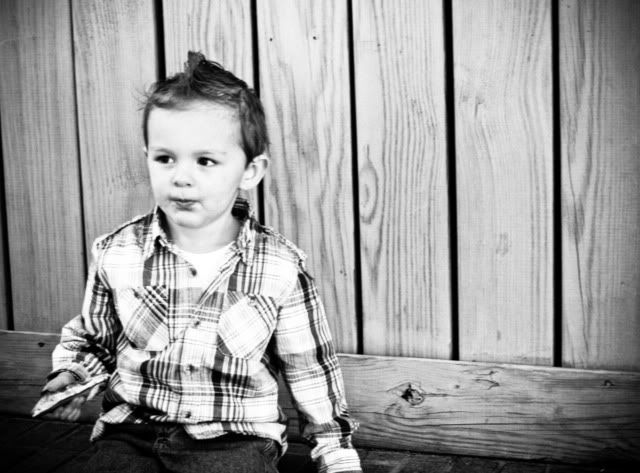
And then after just a few fixes
So how did I get to my fix?

She had a bit of a rash on her face and a runny nose, so I first used the retouch brush in iPhoto. Most programs have a retouch brush that you just click over the area you want fixed, so easy.

Then I took the picture into light room and the following is all I did.

1- Increase black clipping (sliding bar by the word black) +6
I did this as the little triangle on the left side of the histogram was not lit up and so I increased the black a little

2- Increased the brightness +61

3- Used a brush-Wow Eyes Sharpen and did one quick swipe over each eye

4- Used the Brightness brush, increased the size of the brush and swept it once over the left side of her face as it was a little too shadowy

5- Used Preset- Semi Fix the Flat

6- Increased the Vibrancy

7- Decreased the red saturation to -27

So 7 steps may sound like a lot-but it took me at most 4 minutes, probably less to make this fix.

Obviously, the less time you can spend fixing a picture the better off you are. So when you start with a great picture it is so much easier.

And she actually sent me a couple of pictures asking if I could fix one or both, and since the fix was so easy and fast, here is the second picture I did just for fun.


Have a picture you would like me to fix?
Send me a picture at photo (at) emmymom2 (dot) com

Just be advised I have about three more pictures waiting, so it will be about one month until your edit is done.

Wednesday, February 9, 2011

Fix It For Me Wednesday: Presets

This week's picture was sent to me by someone who I was lucky enough to "meet" as we were partnered for a Christmas Swap. Mandy of Mandy's Marvelous Musings sent me this cute picture of her nephew.

To edit this picture I used both Aperture-as I do love the sharpening tool in it and mostly Lightroom. Really, one of these weeks I will use something else promise! So here are the original and finished pictures top to bottom.


The original picture wasn't completely sharp, her shutter speed was probably not quite high enough for the amount of light. So something I find that can often work for pictures that aren't as sharp as you want them is to make it black and white.

One of the great things about Lightroom is a lot of the presets that you can get for it. Sometimes though when you click on a preset you might think it isn't quite right.

So I first cropped the picture just a tiny bit-to help it fit the rule of third's a bit better. And then I used the preset B&W Creative-Look 2 and this is what I got

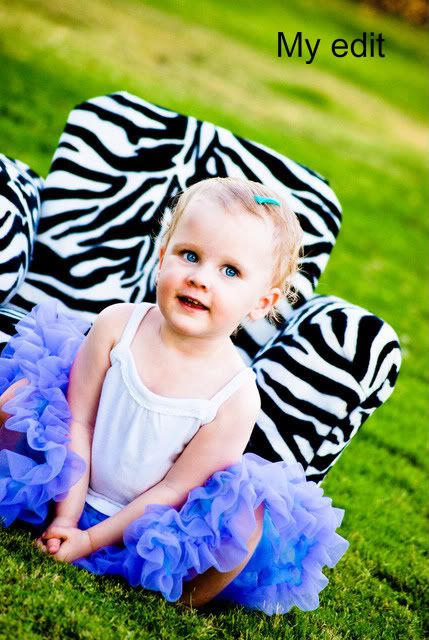
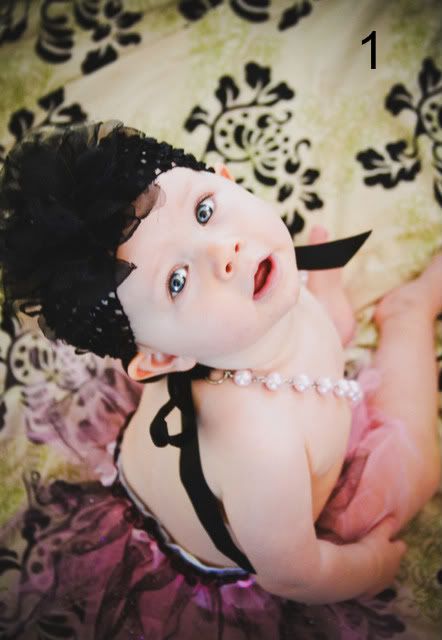
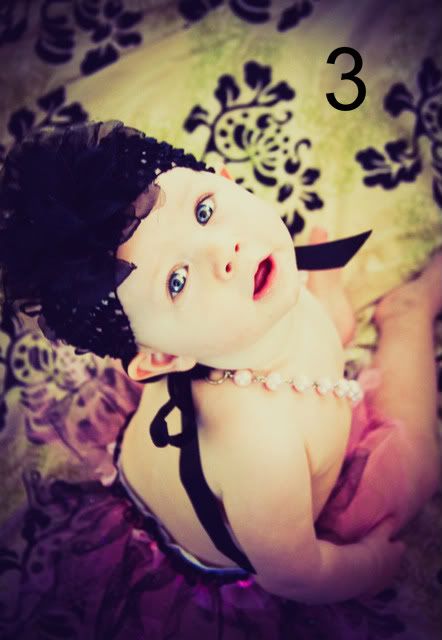
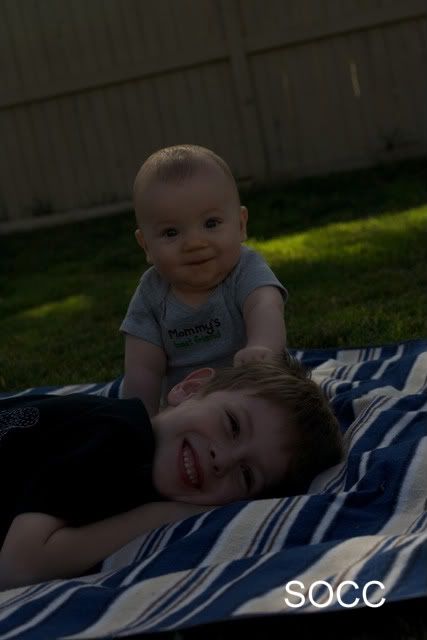
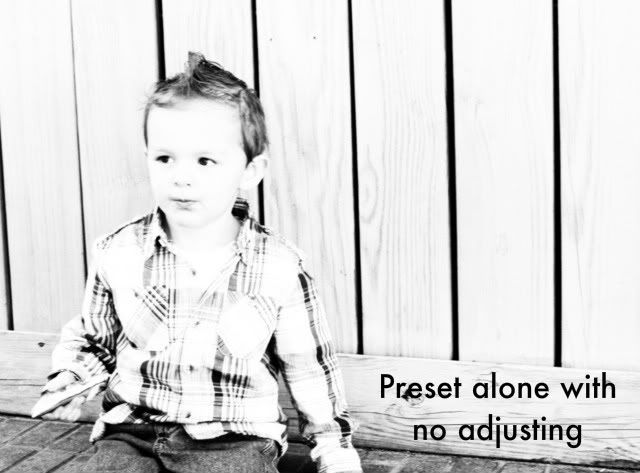
Obviously way overexposed. Now at this point I could either undo this and chose a different preset or I can just work with this, which is what I did.

I then went and decreased the exposure by almost a whole stop (.75), I adjusted the highlight recovery and then continued just playing with the exposure a bit. I also sharpened the picture a bit (almost always a must for any picture you will be showing online anyway), added some clarity, and then added a slight darkening vignette around the edges.

And just for fun here is the same picture with the Preset Summer love and some vignette
So quick easy fixes, mainly using just presets that can make a very cute picture totally adorable.

Wednesday, February 2, 2011

Fix It For Me Wednesday: Underexposed

Well this posting a bit late but all of the snow delayed me.... sorry bad joke. I did grow up in the Midwest though and seeing all of my FB friends pictures seriously made me expect to see snow out of my window this morning.

The picture I was asked to fix today is one that is very special to this couple and well I will just let her tell you why.
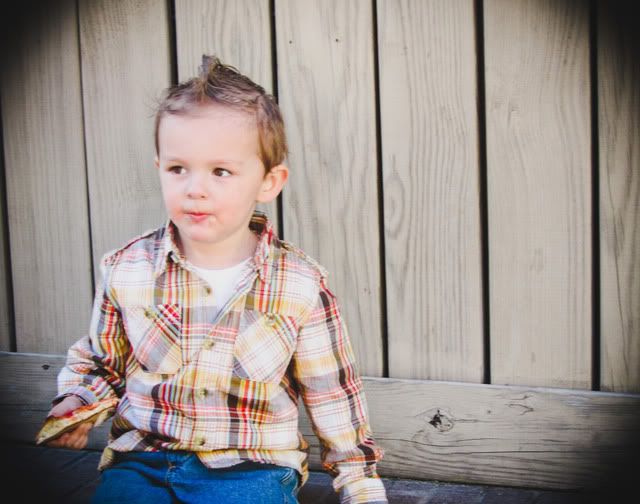
It turned out super dark and normally I would just say oh well, except that this picture and pose look almost exactly like a picture we took moments after we got engaged. From the Christmas tree, to the pose, to the colors we're wearing, it's almost like the same picture just flash forward 6 years. So I'd love to put them in a frame together.
So after reading that, of course I wanted to help! I decided that I would just try and fix the color and exposure as much as possible without giving it a totally different look so it could match the first picture better.

So the first is the picture Mary sent me and the second is with my fixes. 
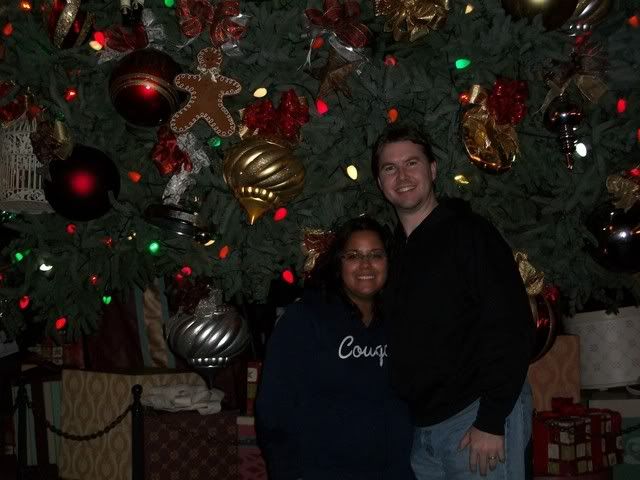
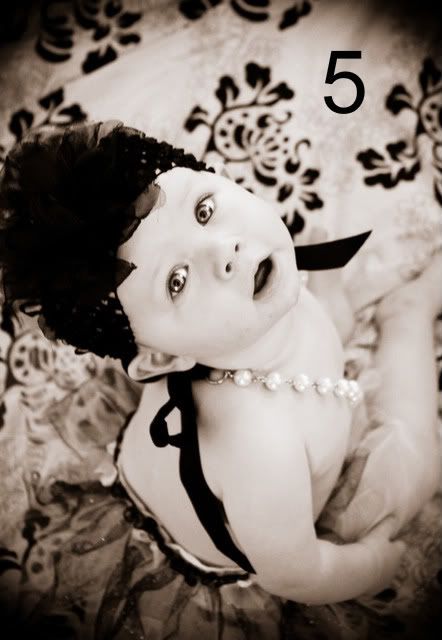
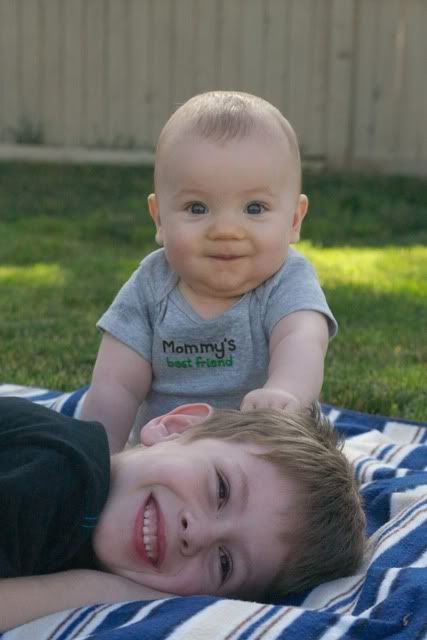
I used Lightroom again for these edits. When I first started working on the picture, I simply tried just bumping up the exposure and brightness, but that led to the faces just looking all weird and the colors weren't quite right.

So I first added more fill light (+26)- the fill light is the background light. And then increased the exposure by +.25. After adding more light, the picture started to look really grainy or had a lot of noise. So I went to the Noise Reduction area and added luminance smoothing and detail, but I also sharpened the picture a bit at the same time. I then went in and brushed in some more exposure to their faces only. I sharpened the eyes with the Wow Eyes sharpen brush, and got rid of the glasses glare with the clone brush. And finally did a preset I love WOW b-Auto-Tone+Crv 04.

So all of that summed up in English.. sometimes with dark pictures, you simply can't just increase the exposure or brightness, but might have to do it in selective areas. Also, as you increase the brightness and exposure you are going to get a lot of noise or grain in the picture--so try your best to get the right exposure out of camera as it makes your life easier.

As always, if you would like me to fix up a picture or if you have a picture you love but want it to be black and white or an antique look or some other look email me the picture at fix (at) emmymom2 (dot) com

And Mary-I will email you the fixed picture.

Wednesday, January 26, 2011

Fix It For Me Wednesday: Light Room

This week's picture was submitted to me by my good friend Bethany. I met Bethany my freshmen year of college. We had lots of fun playing Yahtzee late into the night and would scream any time we got a Yahtzee-the girls on the floor loved us I am sure. I even was a part of her wedding and now many years later she has three adorable kids, including the cute little guy in today's picture.

She likes this picture and has been meaning to get it hung, but was hoping for that little extra punch to make it that much more special. For all of today's edits, I used Adobe Lightroom.

There are a lot of great presets for Lightroom available. Presets are one click actions that can take a picture from color to black and white or to a sepia or even a bright pop look. And the best part is there are a lot of great free presets out there. If you have Lightroom you should definitely go to Pretty Presets web site http://prettypresets.com. They have some of my favorite presets and they often have free ones, espeically if you are a Facebook fan. Also, make sure you check out Matt's Killer Lightroom Tips, found here. He talks about how to use Lightroom and has lists of the free presets available.

I must apologize, Lightroom is the editing software I mostly use for my photography business and so I use it a lot. And well I tend to just jump in there and do a lot of little things without really paying attention to what I am doing, so I will try to explain what I did with this picture.

Here is the original and my fixes.


This was really already a super cute picture to begin with, so why alter something that is already cute? Yes, his hand is unfortunately blurry, but that would be nearly impossible to fix, without another similar image to steal his hand from.

I cropped the image just a tiny bit, the scenery is so great so it is worth seeing but he does get lost in it a bit. I then bumped up the exposure a bit.

If you know you want an image cropped-it is best to crop it before adjusting exposure, etc as you may crop out bright or dark spots that will change the overall exposure and look of the picture.

I then used the paintbrush tool with a "Wow Eyes Sharpen" tool. I am almost positive I found this tool though Matt's Killer Lightroom Tips. I increased the black clipping, the clarity and vibrance.

I set the Tone Curve to Medium contrast. I have found this gives the colors an extra pop and often more definition. I then ran another preset I love called "Seim Fix the Flat".

This might all seem confusing and you might have no idea what I am talking about.. but the point is, to feel free to mess around with the different settings and different presets, with time you will learn what you like and what works and it will become second nature.

And just for fun here is the image in Black and White.
Next week I am going to save another really dark image for a friend. Also, if anyone is interested, I could make a video with screen shots showing how I edit a picture. If anyone is interested just let me know-and let me know what program you use and would like to see me use.

Wednesday, January 19, 2011

Fix It For Me Wednesday's

Welcome to the first Fix it For me Wednesday's! This is the day that I will take a picture (mine or one of yours that you send me) and give it that extra special touch or fix and show you how I did it. I will use different programs to fix pictures over the weeks as I know you don't all have the same editing programs I do.

If you would like to have a picture fixed just email me the full size image at fix (at) emmymom2 (dot) com.

A rule I have learned when taking pictures is do not delete pictures on the camera, wait until you get home and upload them. Sometimes when you look at the image on the viewfinder you may look at it and think the picture is great only to find out it is blurry, or you will think it is a horribly underexposed like this one
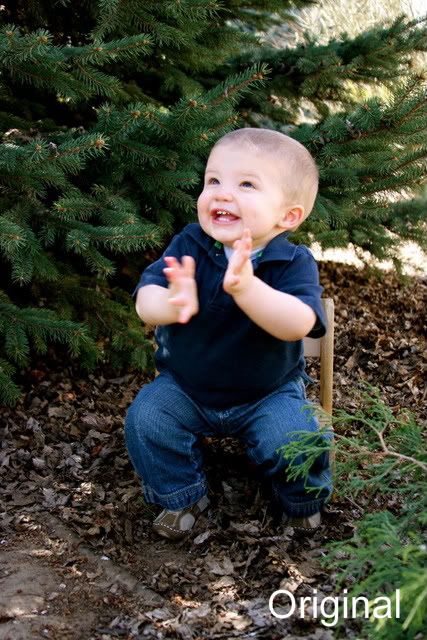
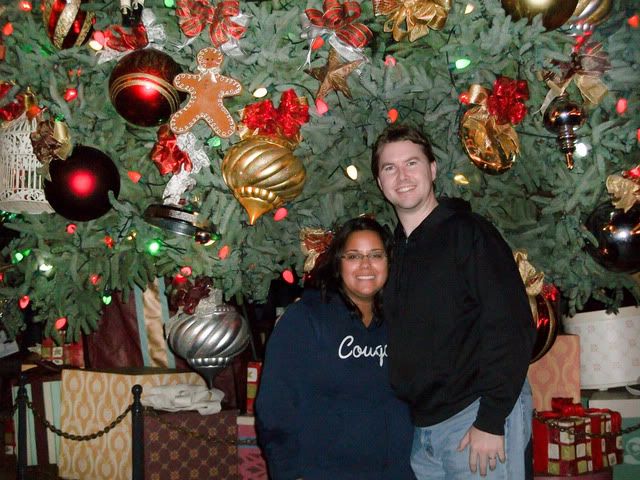
Camera: Canon 5D Lens 85 mm ISO 100, f/9 1/320(this was incorrect)

I had been taking some other pictures, then started taking a bunch without noticing the settings on my camera. After I took about 15 I realized my exposure was way off. I was so mad as look at those cute smiles! See even professionals take horrible shots sometimes. But I decided I wanted to try and save it. I knew I would never be able to get the colors amazing and really popping like I like, but I wanted to try and save it.

For these edits I used Aperture, is is Apple's program similar to Lightroom. And with the launch of the new App store, if you have a Mac you can get Aperture for only $79! (Regularly $200-so get it!! if you have a Mac)

First I adjusted the exposure +2 stops. I also increased the brightness .12 and the recovery .20
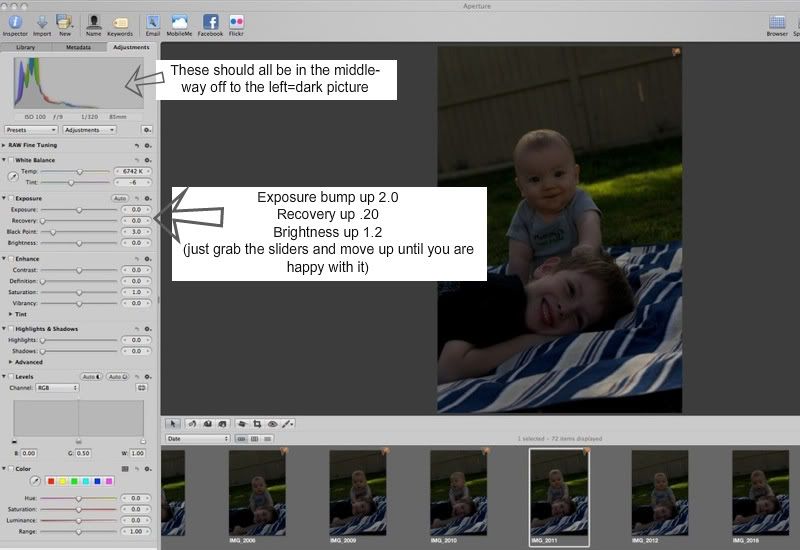
Here is a part of my screen shot when I first opened this picture in Aperture. Click on the image to see it larger.

After fixing the exposure, I grabbed the sharpen brush (from that paint brush menu next to the red eye below the picture on the left) and ran it over Ryder's face mainly, especially around his eyes. I also bumped up the contrast and vibrancy just a tiny bit (under enhance menu on left) And this is why I got.
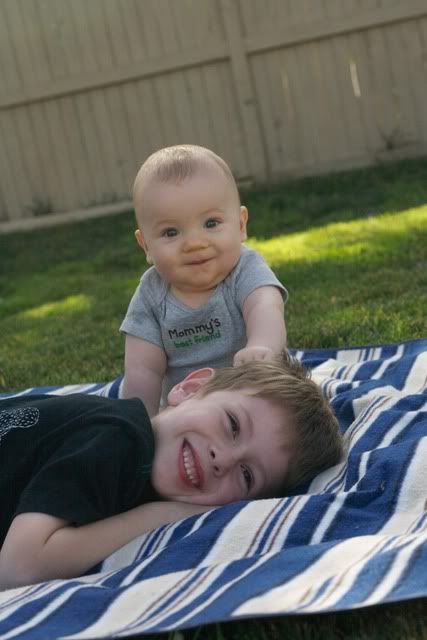
But I wasn't done yet. The picture was a bit too warm or yellow for my taste (look at Ryder's face), I tried to keep this as simple as possible, so I went to the presets (the menu right under the histogram) chose White Balance and selected Day Light. Doing this decreased the temperature (Temp) towards the blue side and put the tint a tiny towards red to balance it out a bit.
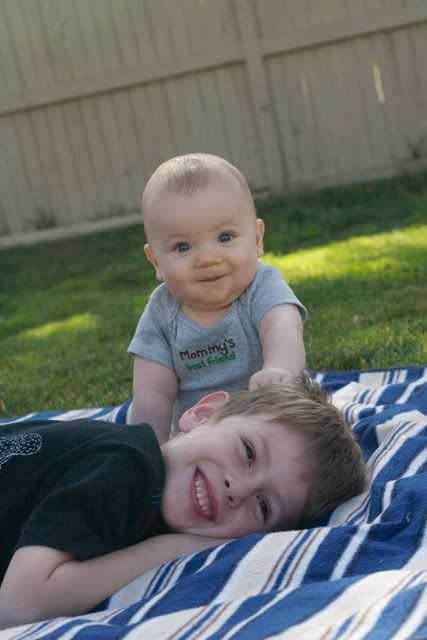
When you are choosing a preset, previews of the picture will pop up when you hover over any of these presets so you can decide if you like it and click it if you do. Don't be afraid to experiment and bump things around. You can always undo it.

Also the grass in the lower right hand corner where the blanket doesn't cover the grass, was driving me crazy... so color balance and a bit of cropping and...
Now you may notice my horizon is crooked. As a general rule you do NOT want your horizon to be crooked. Especially shots of the beach or ocean. But if it is obviously crooked or crooked enough, as it is in this picture it can work. But if I decide I don't like that look, I can use the straighten tool (sort of like a cropping tool available in pretty much any program) and then I get this
So I went from a picture that easily could of been thrown away to a picture, that still is not photographically perfect, but is when I will personally love forever.

If you have any questions, feel free to comment or even email me. And if you have a picture you would like for me to fix or give that extra pop email me them to me at fix (at) emmymom2 (dot) com.