
If you would like to have a picture fixed just email me the full size image at fix (at) emmymom2 (dot) com.
A rule I have learned when taking pictures is do not delete pictures on the camera, wait until you get home and upload them. Sometimes when you look at the image on the viewfinder you may look at it and think the picture is great only to find out it is blurry, or you will think it is a horribly underexposed like this one
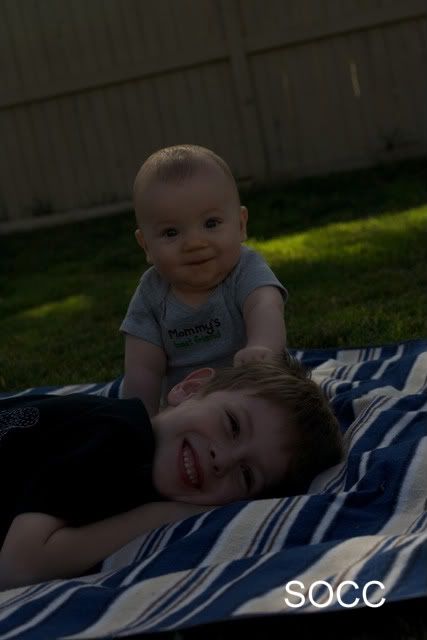 Camera: Canon 5D Lens 85 mm ISO 100, f/9 1/320(this was incorrect)
I had been taking some other pictures, then started taking a bunch without noticing the settings on my camera. After I took about 15 I realized my exposure was way off. I was so mad as look at those cute smiles! See even professionals take horrible shots sometimes. But I decided I wanted to try and save it. I knew I would never be able to get the colors amazing and really popping like I like, but I wanted to try and save it.
For these edits I used Aperture, is is Apple's program similar to Lightroom. And with the launch of the new App store, if you have a Mac you can get Aperture for only $79! (Regularly $200-so get it!! if you have a Mac)
First I adjusted the exposure +2 stops. I also increased the brightness .12 and the recovery .20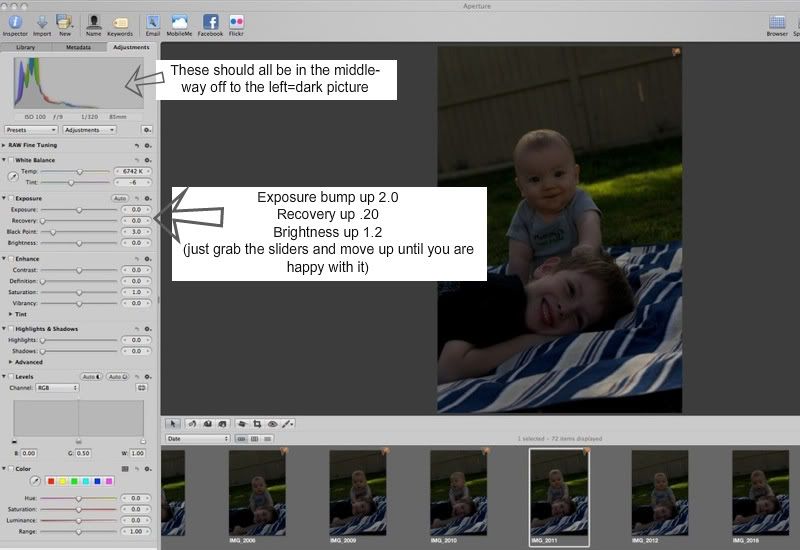 Here is a part of my screen shot when I first opened this picture in Aperture. Click on the image to see it larger.
Here is a part of my screen shot when I first opened this picture in Aperture. Click on the image to see it larger.After fixing the exposure, I grabbed the sharpen brush (from that paint brush menu next to the red eye below the picture on the left) and ran it over Ryder's face mainly, especially around his eyes. I also bumped up the contrast and vibrancy just a tiny bit (under enhance menu on left) And this is why I got.
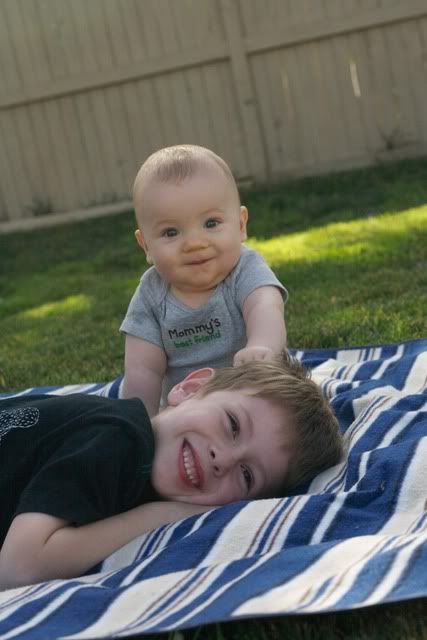 But I wasn't done yet. The picture was a bit too warm or yellow for my taste (look at Ryder's face), I tried to keep this as simple as possible, so I went to the presets (the menu right under the histogram) chose White Balance and selected Day Light. Doing this decreased the temperature (Temp) towards the blue side and put the tint a tiny towards red to balance it out a bit.
When you are choosing a preset, previews of the picture will pop up when you hover over any of these presets so you can decide if you like it and click it if you do. Don't be afraid to experiment and bump things around. You can always undo it.
Also the grass in the lower right hand corner where the blanket doesn't cover the grass, was driving me crazy... so color balance and a bit of cropping and...
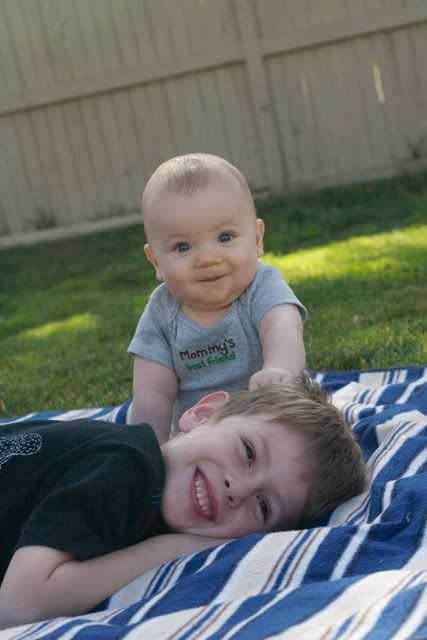
Now you may notice my horizon is crooked. As a general rule you do NOT want your horizon to be crooked. Especially shots of the beach or ocean. But if it is obviously crooked or crooked enough, as it is in this picture it can work. But if I decide I don't like that look, I can use the straighten tool (sort of like a cropping tool available in pretty much any program) and then I get this

So I went from a picture that easily could of been thrown away to a picture, that still is not photographically perfect, but is when I will personally love forever.
If you have any questions, feel free to comment or even email me. And if you have a picture you would like for me to fix or give that extra pop email me them to me at fix (at) emmymom2 (dot) com.


AWESOME!! Maybe someday when we have a Mac, I'll get that program and when you visit you can teach me all the tricks. Editing is one thing I don't do very well. I think this picture turned out amazing!
ReplyDeleteOh wow! Look at the difference! Awesome job!
ReplyDeleteWow that really made a big difference. And yeah, that would be a shame to have deleted it before trying to fix it. It really is cute!
ReplyDeleteIt's such a cute shot! I'm so glad you were able to fix it up!
ReplyDelete